jueves, 1 de diciembre de 2016

Recuperar contraseña perdida de Windows

Para poder recuperar tu contraseña perdida de Windows necesitarás descargar

Offline Windows Password & Registry Editor, Bootdisk / CD

:


1 — Download And Unzip File

Decide whether to boot from a USB Stick or from your DVD/CD drive. Download the appropriate file. If you do not have a program to unzip this download you can get 7-Zip here.

2.A — Burn ISO Image To Disc (Boot from DVD/CD)

Right-click on "cd140201.iso" and select "Burn To Disc". If this option doesn't appear than you may need to install disc burning software such as Astroburn Lite.

2.B — Copy Files To USB Stick (Boot from USB)

Copy the files from "usb140201.zip" onto your USB Stick. Ensure that they are directly on the drive and not dropped inside a directory. Open a command prompt (Run As Administrator) and navigate to your USB Drive. Type "X:syslinux.exe -ma X:" (substitute the your USB drive letter for "X") and hit Enter.

3 — Restart Your Computer And Enter BIOS

Insert your Disc or USB Stick into the target computer. Restart and during the load screen hit the key that allows you to enter BIOS (usually F2, F6, F10, F12 or DEL).

Once inside the BIOS, navigate to the "Boot" tab. If you are booting from a Disc, ensure that the Disc Drive is the first boot device. If you are booting from a USB Stick, ensure that it is the first boot device. Press "F12" to Save and Exit. The computer will restart.

If the computer still refuses to boot from the Disc or USB Stick then it's possible that Secure Boot is still enabled. Learn how to disable Secure Boot. If the computer doesn't allow you to disable Secure Boot than you may need to switch from UEFA to Legacy Mode.

4 — NTPasswd Boot Menu

Once you've restarted this menu should appear. Press ENTER.


You'll see a bunch of white text cascade down that you can ignore.

5 — Select The Hard Drive Partition

Choose the hard drive partition that contains Windows. Type the corresponding number and hit ENTER.
Hint: It's usually the largest partition and is never the one labeled BOOT.

6 — Confirm The Registry Directory Path

 This screen asks you to confirm the registry path. Press ENTER.

7 — Choose Password Reset

 This screen prompts you to choose the password reset option. Press ENTER.


The next screen asks you if you want to edit user data and passwords. Press ENTER.

8 — Choose Which Account To Change

All of the Windows User Accounts are listed. Enter the name of the account that you'd like to change.    

On the next screen, enter 1 to clear the password and hit ENTER. You should see a "Password cleared!" message. Type "!" to exit and hit ENTER.

On the next screen, type "q" to quit.

9 — IMPORTANT: Save Changes

This screen asks if you want to write the files back. Type "y" and hit ENTER.
Your changes are now saved.

The program then asks if you want to run it again. Type "n" and hit ENTER.

10 — Restart Your Computer

Remove the Disc or USB Stick from the computer.

Press CTRL + ALT + DEL to restart.

You should now be able to access your account and set a new Password.    

jueves, 19 de mayo de 2016

Reparar el inicio de Windows 7 tras sustituir placa base y micro

Cuando se actualiza el hardware de una máquina cambiando Placa base con Chiset distinto al que tenía o Micro Procesador CPU de otro fabricante,  Windows 7 suele dar problemas de arranque.

Recientemente tuve que enfrentarme a este problema, cambie de una placa Asrock N68c-N UCC con AMD LE-140 a una Asus H81M-K con un Intel i3-4170, el equipo estaba configurado con un software que no se podía perder cosa que ocurriría si tenía que reinstalar el S.O,

Comencé a investigar hasta llegar a esta página http://www.lapizcorto.com/reparacion-de-inicio-de-windows-7-tras-cambiar-la-placa-base/ donde se explica una solución basada reactivar dichos controladores, como bien se explica en el KB922976, bien restaurando momentáneamente el hardware original, o mediante las herramientas de reparación integradas en el DVD de Windows 7 (en el símbolo de sistema podemos ejecutar RegEdit), o incluso utilizando un editor de registro offline, como el incluido con UBCD4Win. Las claves que debemos modificar son:
HKEY_LOCAL_MACHINE\System\CurrentControlSet\Services\Msahci
HKEY_LOCAL_MACHINE\System\CurrentControlSet\Services\IastorV
Poniendo en ambas el valor de Start a 0.
Lo intenté y no me funcionó :-(

Así que continué leyendo y uno de los comentarios proponía una solución que paso a ofreceros:
**Cómo podéis ver está en inglés pero voy a tratar de exponerla en castellano.


  1. Lo primero es conseguir los drivers de tu nueva placa base.
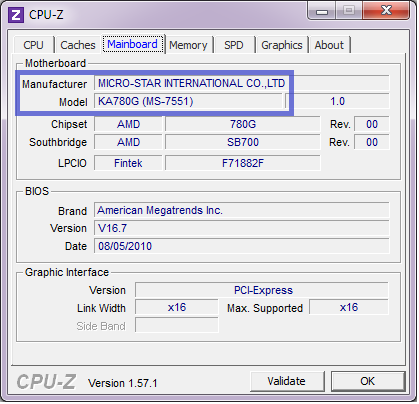
    Sí trae un CD de drivers o sabes cual es sin problema, sino puedes usar la herramienta 
    CPUID(CPU-Z) para averiguarla.
  2. Crea una carpeta en tu PC para meter los drivers, yo por ejempleo usé w732bit
    Importante los drivers del Chipset, USb3.0 y Sata
  3. Ahora elige un medio donde poner tus drivers, o bien grabas un CD o un Pendrive (yo use pendrive)
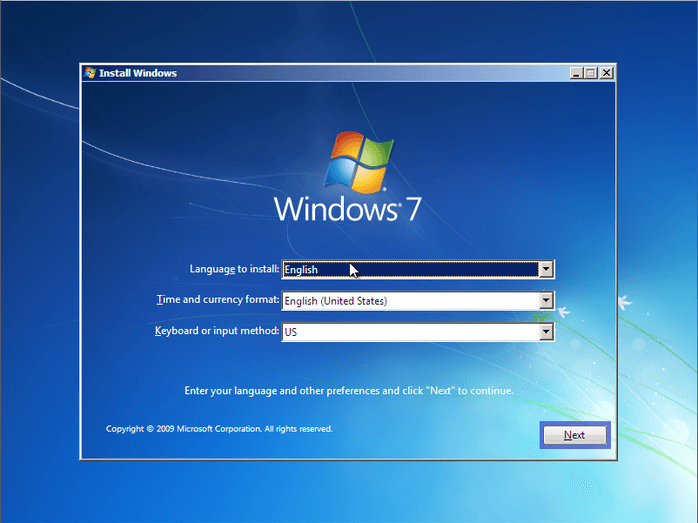
  4. Debes usar el disco de instalación de Windows 7, cuando llegues a esta ventana, haz clic en siguiente:

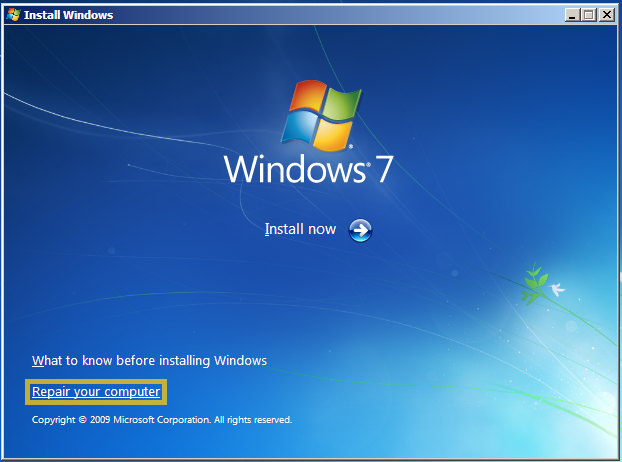
  5. Y en la parte inferior izquierda selecciona reparar


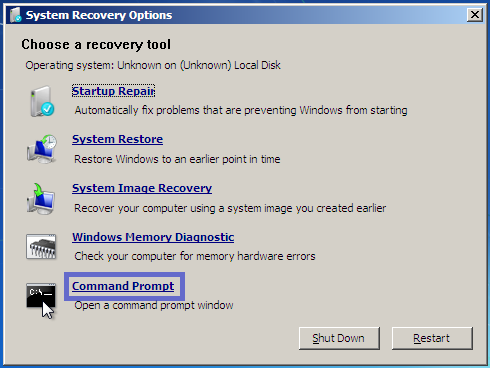
  6. Luego debes elegir la opción Consola del Comandos
  7. Una vez haz llegado aquí tienes que prepara el dispositivo con los drivers, Pendrive o CD (si es CD cambia el disco de instalación de windows 7 por el de drivers que has grabado.
  8. Desde la linea de comandos localiza la unidad del dispositivo donde están los drivers, para ello ve probando:
    D:
    dir
    E:
    dir

    Y así hasta que la unidad muestre el contenido que pusiste (la carpeta w732bit) 
  9. Ahora que ya sabes la unidad, pongamos que es la X tenemos que escribir lo siguiente en la consola:


    dism /image:c:\ /add-driver /Driver:X:\w732bit\ /recurse
  10. Con este comando incorporamos los nuevos drivers a Windows 7
  11. Después escribe el comando EXIT 
  12. Y pulsa sobre el botón REINICIAR.

A mi me funcionó. ¿Y a ti?

Déjame tú experiencia como comentario.